Packages
Codeflow is inherently modular. Even the basic language constructs, like iterate, throwError, executeFlow etc, are made available as modules. The modular architecture minimizes the learning curve and provide a unified interface for configuring the modules. A group of modules is called as a package in Codeflow. Codeflow ships with a set of standard packages by default that provide the core language constructs as well as many commonly used utility functions.
Codeflow platform also includes a vibrant package ecosystem that lets developers publish and share custom packages that are not part of the core platform.
Standard packages
The standard packages are a set of commonly used packages available by default in Codeflow. Standard packages are available both in the engine and the designer without installing additional packages from the package repository. Below is the list of standard packages available in Codeflow:
| Package name | Description |
|---|---|
| core | Core package provides core modules that form the basic building blocks of Codeflow. It is detailed below . |
| core/timer | A simple timer trigger and a delay module. |
| core/dictionary | Package to manage global dictionary objects. |
| core/console | Print messages to standard output and standard error streams. |
| core/file | Modules for basic file operations. |
| core/file-extra | Advanced file operations. |
core/file-listener |
File listeners. |
| core/path | Path utility methods. |
| core/date | Date operations. |
| core/http | Modules for setting up HTTP server and send back responses. |
| core/http-session | Modules to get/set HTTP session variables. |
| core/script | Write native Node.js code. |
| core/json | Utility modules to parse and serialize JSON. |
| core/events | Modules for message passing and listening. |
| core/system | Execute system commands. |
Core package
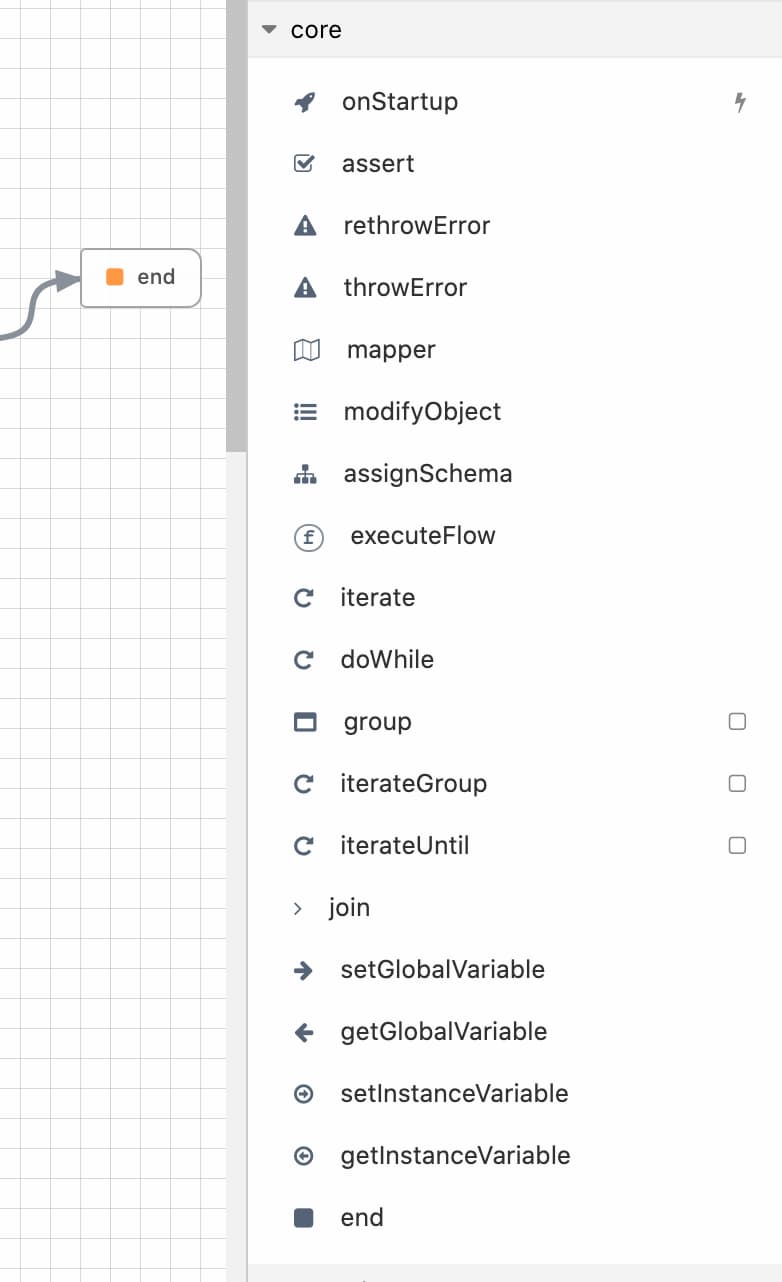 The core package panel shown opened in the designer
Among the standard packages, the core package includes modules that form the basic building blocks of the language. Below is the list of modules in the core package:
- onStartup
- start
- assert
- assignSchema
- mapper
- doWhile
- end
- executeFlow
- iterate
- join
- setInstanceVariable
- getInstanceVariable
- getVariable
- setVariable
- rethrowError
- throwError
start
The start appears by default in a new flow and is not available as a module in the package panel to drag & drop. The start step is the first step of a flow and marks the beginning of a flow. The input schema of a flow is specified in the start step.
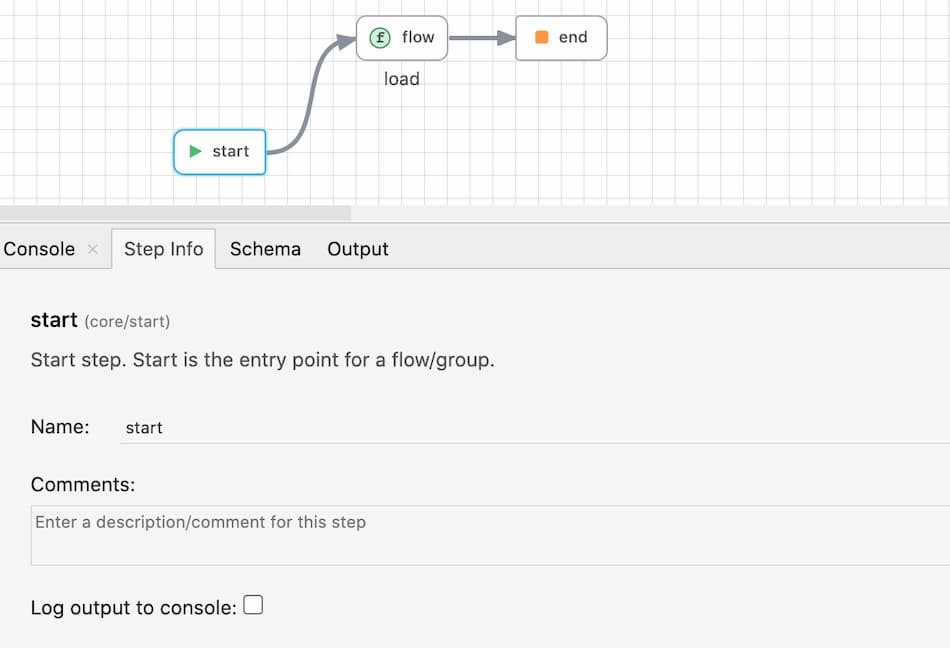
end
The end module marks the end of a flow. The end also appears by default in a new flow, however more end steps can be placed in a flow to have multiple return points. The data mapped in the input tab of the end step is the data that is returned by the flow.
Asynchronous execution: When a flow encounters the end step, it returns back with the data, if any, to the parent flow. However if there are any asynchronous steps - steps that are not connected to the end - they will continue to run even after the flow returns. This is useful to build flows that need to perform some function (e.g send an email, log data etc) that need not be completed before returning.

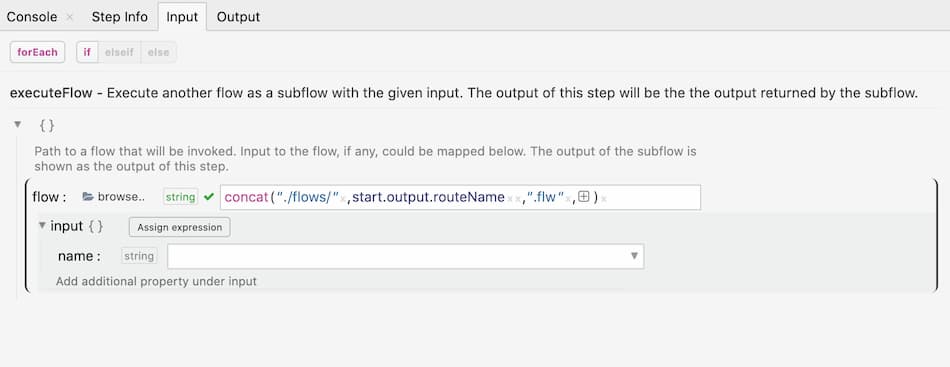
executeFlow
The executeFlow is a very important module that helps developers compose flows. The executeFlow will invoke a subflow with an input data and get back its output. To invoke a flow, specify the flow When a flow file is chosen, the input and output for that flow is automatically shown as input and output for the executeFlow module.
The below animation shows using executeFlow to invoke a sub flow.
Dynamic execution
For dynamically executing a flow, simply pass an expression to the Execute Flow step. This is useful to perform wide range of hacks like routing to a flow based on an API parameter etc.
Since you need to map data to be passed to the Flows, you need to make sure that all the Flows invoked dynamically have the same input and output structure. To map the input and output correctly, first choose a Flow manually with the required input and output structure and then change the file name to an expression.
iterate
the iterate module is the useful for performing a loop operation in Codeflow. For each item in the collection, a sub flow is invoked and the output collected as an array.
iterate works similar to executeFlow. To iterate over an array or an object, set the collection field with the object or array and choose the flow that should be invoked for every iteration. The key field is used to change the name of the iteration key if required. The input section will automatically update to match the input schema of the chosen flow.
The below animation shows an example of configuring the iterate module:
mapper
The mapper is used to create a new object and map data into it based on a given schema. mapper is useful to perform mapping from one type to other. Define the schema in the Input Schema tab. This is a schema builder that lets you build the schema visually. You can build any structure and can refer to any existing schema as well.
Once the schema is defined, you can map the values in the Input tab. Values can be entered as static values or mapped from previous steps. Learn more about advanced data mapping under the section - input mapping.
Below animation shows the working of mapper:

assignSchema
The assignSchema step works similar to the mapper. Instead of creating a new Object based on schema, the assignSchema step binds a schema to the given object. The output of the assignSchema step will automatically reflect the schema specified in the input.
Below animation shows the assignSchema module in action:

setVariable
setVariable and getVariable modules are used for setting and getting global variables. Global variables once set will remain as long as the engine is running.
Use setVariable module by specifying a key and value to set a variable. If the key is already used, it will overwrite the value. To retrieve a value, use the getVariable with the key used to set the value.
setInstanceVariable
Instance variables are similar to Global variables except that they are scoped to the current flow instance and its children. This is useful to manage data that should only be visible to the current instance and its child processes.
The working of setInstanceVariable and getInstanceVariable is similar to setVariable and getVariable above.
throwError
The use of the throwError module is to throw a custom error. Please read more about error handling to understand the control flow during error and how to handle errors.
rethrowError
The rethrowError module is used to re-throw an exception. Please read more about error handling to understand control flow during error and how to handle errors.
join
The join is a placeholder step used for joining multiple sources or beautifying paths. It works well when you need to join paths from multiple sources or fan out to multiple targets and need a step that does nothing. Few example usage of joins can be found under the control-flow section.
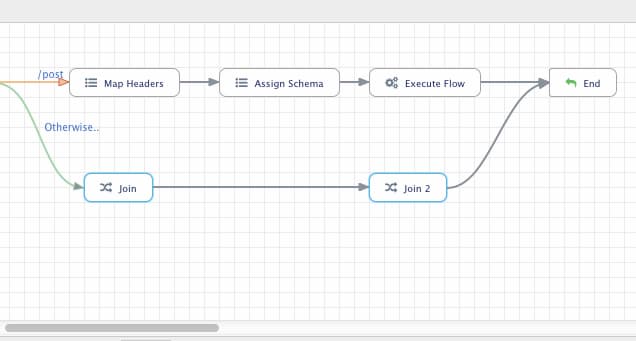 In the above example, the join is used for beautifying the flow by separate an overlaying path.
onStartup
This is a trigger step that triggers during the startup of the project. It is useful to perform any one-time initialization during startup.
Installing packages
The standard library contains only a commonly used set of modules. More packages can be installed from the package repository, which hosts packages published and managed by third-party publishers. The package repository is a great way to extend the functionality without making changes to the the core platform itself.
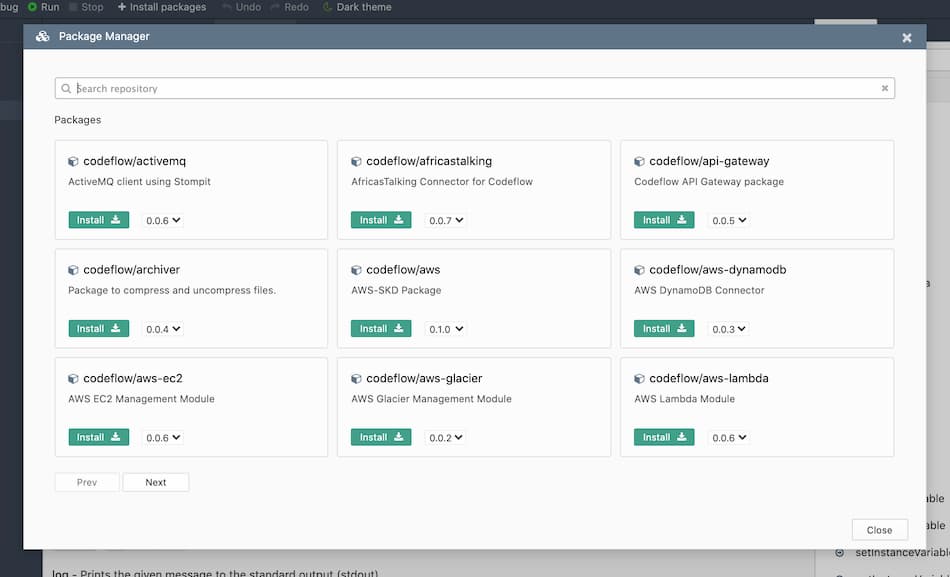
Package manager
The designer comes with a package manager that can explore the packages and install them in just one-click. To open the package manager, click on the download icon on top of the packages tab or choose the menu item Window->Open Package Manager.... The package manager lists the packages available in the repository. To install a package, choose the version and just click the install button. The package and all its dependencies are installed automatically.
From the command line
Packages can also be installed and uninstalled from the command line. This is useful when starting a project from a command line on a remote server.
To install a package:
codeflow install <username>/<packagename>@<version>
To uninstall a package:
codeflow uninstall <username>/<packagename>@<version>