Codeflow tutorial
Welcome to Codeflow tutorial. The below tutorials give a quick hands-on guide to Codeflow concepts before diving deep into the language guide.
Requirements
- Install Codeflow designer for creating & editing projects.
- Install Codeflow engine for executing projects from a command line.
- Basic concept of programming and data types such as Strings, Numbers etc.
- You should have Node.js v12 or greater installed. Visit https://node.js.org to download Node.js.
Tutorial1 - Hello world
Let us build our first Codeflow project that prints a "hello world" message to the console.
Step 1: Create a new project
This step assumes you have installed and opened the Codeflow designer.
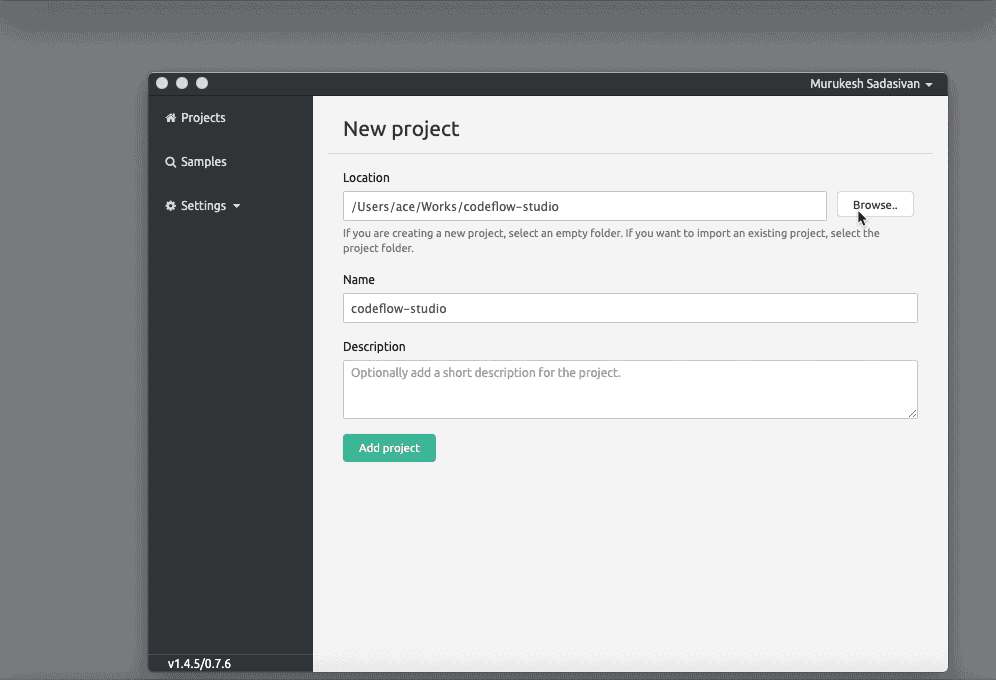 The above animation shows how to create a new project.
Open the designer and click 'Create project' button to create a new project. Choose the location of your choice or create a new folder for the project and click 'Add Project'. The Codeflow designer creates and opens up the new project. This will also create a file package.json inside the project folder, which will store the project details like name, description, version and module dependencies.
Step 2: Creating a flow and printing "hello world"
In this step, we will create a new flow and print a hello world message to the console.
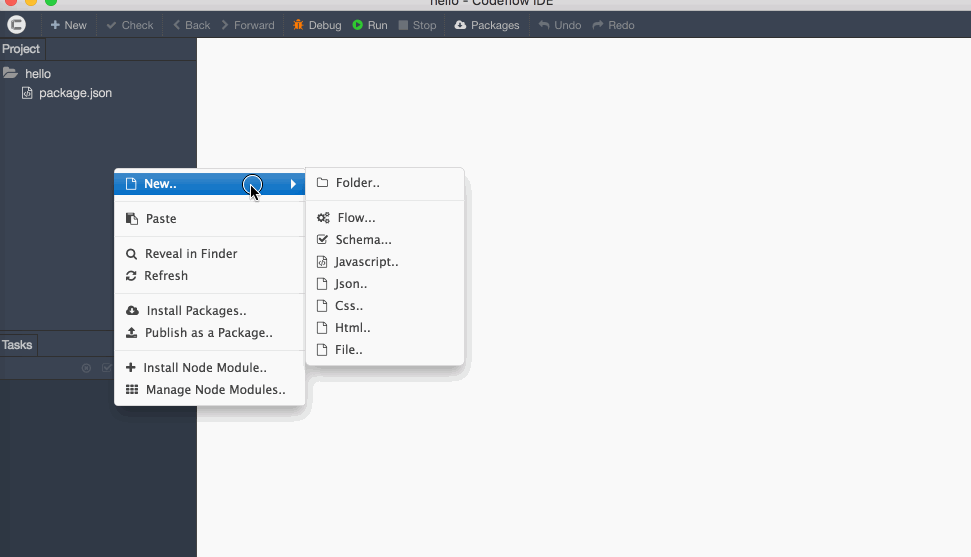 The above animation shows how to create a flow and print "hello world".
-
In the project window, right click on the file panel and select the option New -> New flow.. from the context menu. Name it as
hello. A flow by default will have two steps - Astartand anend, the entry and exit point respectively. -
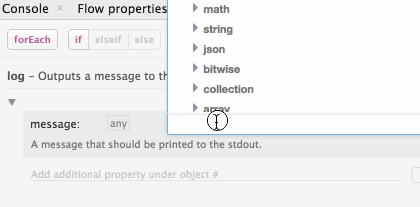
For now, we will keep the
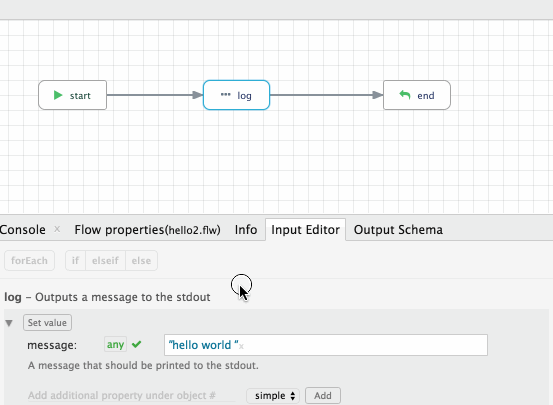
startand theenduntouched. To print a hello world message to the console, click open theconsolepackage in the packages panel and then drag thelogmodule into the canvas. -
The
logmodule, when selected, will display a couple of tabs. Theinputtab is where you configure the properties of a module. For thelogmodule, the only property is a string field namedmessage. Every property accepts an expression as its value which is evaluated during the runtime. We will just use a hard-coded string message"hello world"(including double quotes) as the value of the message property. String fields should always be enclosed in double quotes. Apart from hard coded values, the expression fields can map output data from any of the previous steps and perform complex data transformations.
-
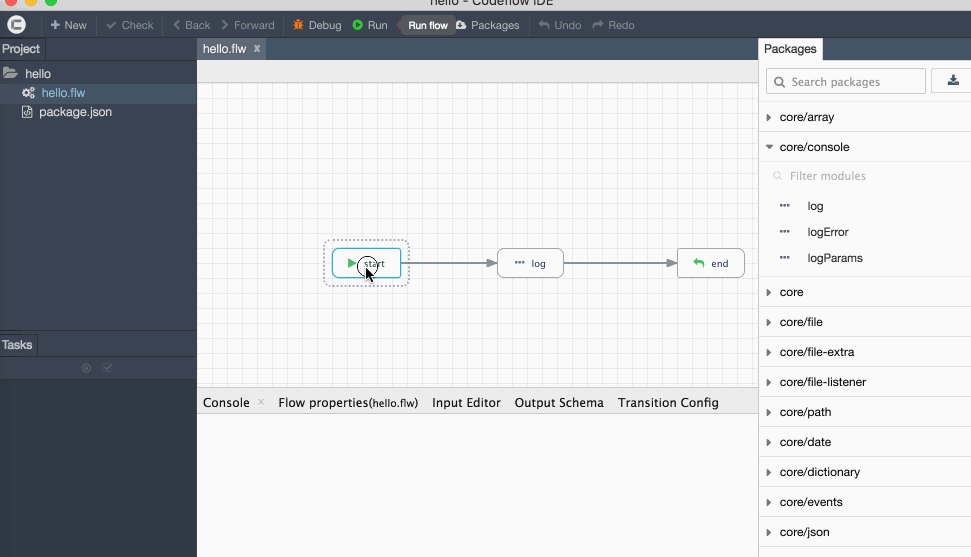
A step is not invoked until it's connected to at least another step. Now, create two connections: One from the
startto thelogand second from thelogto theend. -
Now to start the flow, you can click the run button on the toolbar. The designer will open a terminal emulator and it should now display a "hello world" message.
Step 3: How to pass your name and print it
In this step, we will configure the start step to accept an input value into the flow and later use it inside the log step.
 The above animation shows how to pass an input parameter and use it.
Let's pass a value into our new flow. To do that, you need to add a property in the start step.
-
Click on the
startstep and choose the schema tab. The schema tab is a special tab that is available for few special types of modules including thestartand theendsteps. The schema defined in thestartstep will become the input schema of the entire flow. -
By default, the schema will be an empty object. Keep it like that and click the
Add fieldbutton. Give the new field a name 'name' and keep the type as a string. The output of the start step will now be an object with a single property named 'name'. The output data of a step will be available for mapping in all the subsequent steps. -
Now let's use that newly created field inside the flow. Navigate to the
logstep and select the input tab. Under the message, we will create a new expression to append the name and a"hello"message instead of just static"hello world". -
Codeflow expressions can combine data with utility functions to do complex data transformations. Due to its functional design, every operation, including basic ones like a string concatenation or addition of two integers etc, are performed using functions. In order to append the name with a
"hello"message, click on the expression and chooseSurround with functionbutton from the drop down. This will show all the available functions in the expression builder. You can search forconcatmethod and select it. -
The
concatis a method that takes a variable number of arguments. To concatenate the hard coded string message with the name that we pass as the input, click on the plus arrow button and selectstart->output->namefrom the drop down under the data section.
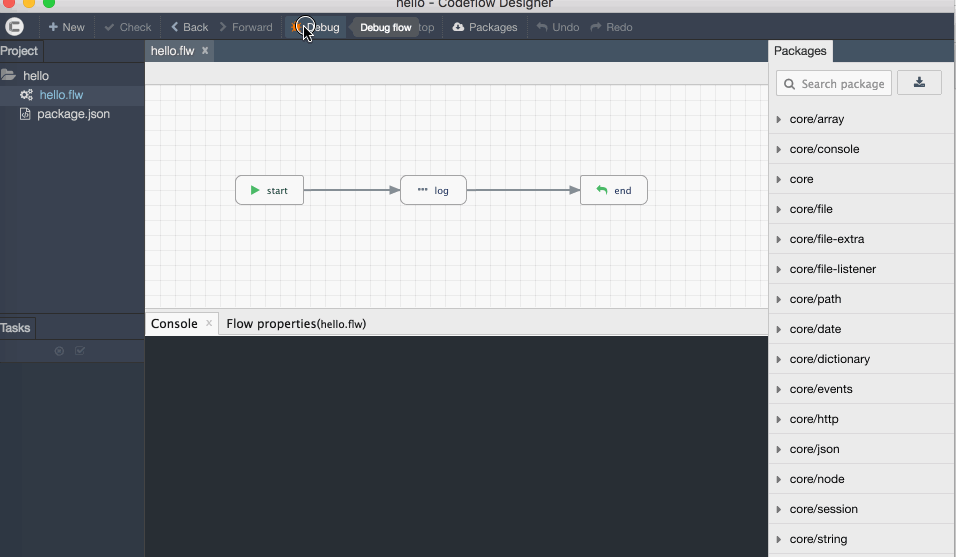
Step 4: Running the flow in debug mode
We will use the debug mode to run the flow this time. The debugger executes the flow in the same way as the run button but will do so in the debug mode, which provides features such as highlighting the execution path and inspecting the input and output data of each step. You can see that the console now displays whatever name that you have passed as the input to the flow.
 The above animation shows how to debug a flow.
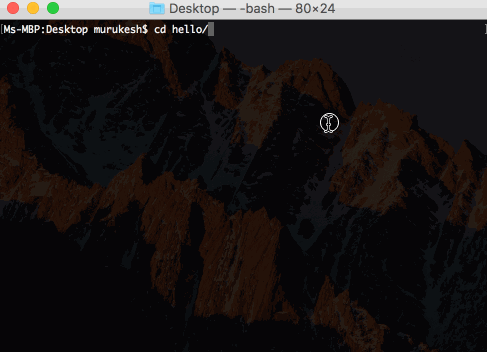
Step 5: Execute hello.flw from command line
In this step, we will also execute the same flow directly from the terminal/command line as well. This is the way Codeflow programs are executed in a live production environment.
 The above animation shows executing a flow from the command line.
In order to do that, you need to install the Codeflow engine, if you haven't done yet. Open a terminal or command prompt and type: (This assumes you have Node.js and NPM installed. If not, head this way.)
npm install -g codeflow
Now navigate to the project's root folder and type:
cd <path to project's folder>
codeflow run hello.flw
Will print:
hello undefined
It is printing undefined because we haven't passed the input yet. Rerun the command by passing the input JSON -
codeflow run -i '{"name": "codeflow"}' hello.flw
This should print
hello codeflow
Summary
That's it. Congrats on completion of the hello world tutorial. What we have covered so far:
- Understanding modules, packages, flows, steps, and transitions.
- Start and End.
- Configuring a step's input.
- Basic understanding of input expressions.
- Executing flows from the designer using the debugger.
- Executing flows from a command line.